Hibernate 中的三种状态
瞬时状态:刚创建的对象还没有被 Session 持久化、缓存中不存在这个对象的数据并且数据库中没有这个对象对应的数据为瞬时状态这个时候是没有 OID。
持久状态:对象经过 Session 持久化操作,缓存中存在这个对象的数据为持久状态并且数据库中存在这个对象对应的数据为持久状态这个时候有 OID。
游离状态:当 Session 关闭,缓存中不存在这个对象数据而数据库中有这个对象的数据并且有 OID 为游离状态。
注:OID 为了在系统中能够找到所需对象,我们需要为每一个对象分配一个唯一的表示号。在关系数据库中我们称之为关键字,而在对象术语中,则叫做对象标识
(Object identifier-OID).通常OID在内部都使用一个或多个大整数表示,而在应用程序中则提供一个完整的类为其他类提供获取、操作。
Hibernate 数据状态图: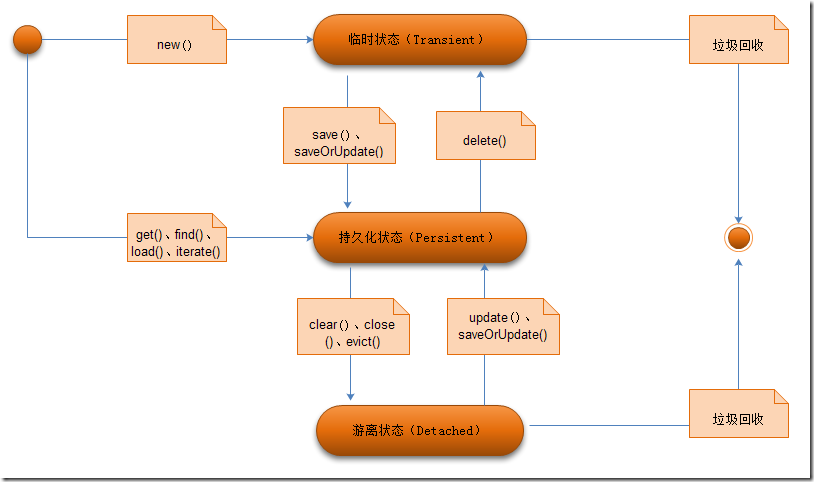
需要注意的是:
当对象的临时状态将变为持久化状态。当对象在持久化状态时,它一直位于 Session 的缓存中,对它的任何操作在事务提交时都将同步到数据库,因此,对一个已经持久的对象调用 save() 或 update() 方法是没有意义的。